Why Cold Weather Prep Cannot Wait Until Freezing Temperatures Arrive
Water expands by roughly nine percent when it transitions from liquid to solid ice. In an engine cooling jacket, water strainer, or plumbing hose, that expansion exerts thousands of pounds of hydrostatic pressure against cast iron, aluminum alloys, and plastic fittings. Proper cold-weather preparation eliminates trapped liquid before the first hard frost arrives, safeguarding expensive mechanical assemblies against cracked blocks and burst supply lines that often go unnoticed until spring launching.
Waiting for freezing forecasts is one of the riskiest gambles a boat owner can make during the autumn months. Service yards fill up quickly once regional temperatures drop, and sudden early cold snaps can catch unattended vessels completely unprotected at the dock or on trailers. Scheduling haul-out and maintenance several weeks ahead of regional historical freeze dates ensures you have adequate daylight, comfortable working conditions, and immediate access to necessary replacement fluids and supplies.
A comprehensive approach to off-season protection touches every system aboard the vessel, from mechanical propulsion and electrical banks to raw water plumbing and exterior fabric shields. Treating the hull, motor, and interior as an interconnected system ensures that one neglected component does not ruin the rest of your investment. Whether you maintain a small skiff or a twin-engine cruiser, methodical seasonal preparation turns an otherwise vulnerable asset into a secure, dormant machine.
Boaters living in northern coastal areas or around the Great Lakes often conclude their on-water season by mid-autumn. If you operate along freshwater lakes, checking local resources such as marinas in Michigan provides clear visibility into seasonal haul-out calendars, dry storage availability, and yard services before ramps ice over.
Draining and Protecting the Outboard Cooling System
Modern outboard motors rely on raw water pulled directly from the lake or ocean to regulate internal engine temperatures. Because these powerheads are engineered with vertical cooling passages, gravity naturally empties most internal water passages when the engine is lowered into an absolute vertical position. Storing an outboard tilted up on its trailering bracket traps residual water inside the lower exhaust housing and powerhead passages, creating an immediate freeze-burst hazard.
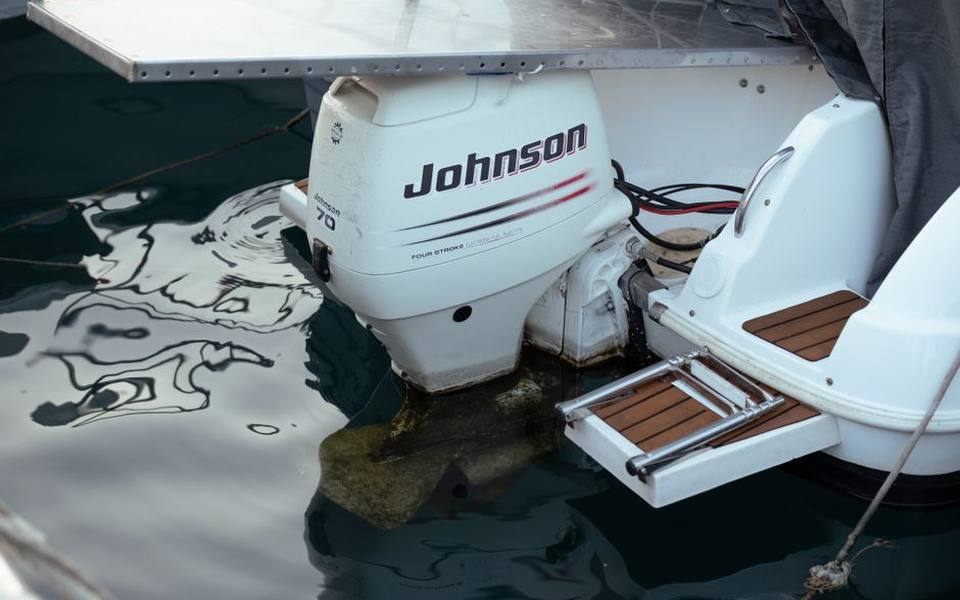
Before final storage, flush the entire cooling tract with clean, municipal freshwater to dislodge salt crystals, silt, and algae deposits that attract moisture. Using dedicated flushing muffs over the lower unit water intakes or connecting directly to the manufacturer-provided garden hose port clears internal passageways. Allowing the engine to idle up to operating temperature ensures the thermostats cycle open, permitting freshwater to circulate through every internal cylinder head cavity.
For vessels kept in regions subject to prolonged sub-zero temperatures, many marine technicians circulate non-toxic propylene glycol antifreeze through the cooling channels. This is accomplished using a submersible pump, a reservoir bucket, and flush muffs while the motor idles briefly until colored coolant streams steadily from the telltale port. This step adds an indispensable safety cushion against residual moisture hiding in low pockets or cooling hoses.
Once flushed and drained, inspect the rubber impeller housed inside the lower gearcase water pump. Impellers that have run multiple seasons can become brittle or take a permanent set, compromising pumping pressure when the engine restarts next spring. Replacing or at least inspecting the water pump during annual autumn servicing eliminates unexpected overheating issues when warm boating weather returns.
Stabilizing the Fuel System and Fogging the Powerhead
Fuel left sitting inside fuel tanks and small engine passages degrades significantly over months of disuse. Modern ethanol-blended gasoline is prone to phase separation, where ambient moisture binds with alcohol molecules and settles at the bottom of the fuel cell as an abrasive, non-combustible sludge. Adding a quality marine fuel stabilizer to fresh fuel and running the outboard for ten to fifteen minutes distributes treated fuel through lines, vapor separators, injectors, or carburetors.
Cylinder walls, piston rings, and wrist pins require physical protection against airborne oxidation while the engine sits motionless. On carbureted or conventionally injected outboards, spraying specialized fogging oil directly into the air intake while the engine runs coats the internal combustion chambers in a clinging, corrosion-resistant film. The motor is typically run until heavy white smoke billows from the exhaust, after which the ignition is turned off.
On direct fuel-injected modern outboards, spraying aerosol fogging oil into intake runners can damage sensitive mass airflow sensors or electronic components. For these engines, manufacturers typically specify pulling each spark plug, fogging a measured amount of protective lubricant directly into each cylinder bore, and rotating the flywheel manually to spread the oil across the cylinder sleeves.
Do not overlook the primary water-separating fuel filter and internal engine fuel strainers during this procedure. Unscrewing the filter canister, emptying its contents into a clear glass jar to inspect for water contamination, and installing a fresh filter primed with stabilized fuel prevents stale, contaminated liquid from gumming up fine internal needle valves during long winter rests.
Servicing the Lower Unit and Gearcase Lubrication
The lower unit gearcase houses precision drive gears, clutch dogs, and high-load bearings that operate under demanding tolerances. If propeller shaft seals or drive shaft seals develop tiny leaks during the season, water enters the gearcase and churns into the oil. If that emulsion freezes over the winter, the expanding water will split the aluminum gearcase casting, resulting in a costly lower unit replacement.
Draining the gear lube in the autumn is the only dependable method to verify gearcase health. Place a clean drain pan beneath the skeg, remove the lower drain plug first, and then remove the upper vent plug to allow the lubricant to flow freely. Healthy gear oil emerges dark brown, amber, or green, whereas water-contaminated fluid displays a cloudy, milky texture resembling chocolate milk.
Inspect the magnetic tip of the lower drain screw for accumulated metal debris. Fine metallic silt is normal mechanical wear, but distinct metal flakes, slivers, or jagged chips point toward chipped gear teeth or failing bearing cages that require immediate mechanical rebuilding before the vessel returns to service. Always replace the small fiber or rubber crush washers beneath both plugs before reassembly.
Refill the gearcase by pumping fresh marine hypoid gear oil upward through the bottom drain hole until fluid emerges steadily without air bubbles from the upper vent opening. Inserting and tightening the upper vent plug first creates a minor vacuum that prevents oil from pouring back out while you quickly thread the lower plug into place.
Winterizing Plumbing Systems and Cabin Interior Spaces
Plumbing fixtures and enclosed cabin compartments demand equal care before cold weather sets in. Freshwater tanks, transom showers, raw-water washdown pumps, and aerated livewells contain rigid lines and plastic valves vulnerable to freezing fractures. Drain holding tanks thoroughly, bypass marine water heaters to preserve their internal heating elements, and draw non-toxic pink marine antifreeze through every spigot until it flows brightly.
Marine heads, whether manual or electric, must have raw intake lines and discharge tracts purged and filled with adequate antifreeze. Never use automotive ethylene glycol in potable water systems or sanitation lines, as it is highly toxic and can degrade internal valve diaphragms. Pumping non-toxic marine antifreeze through the bowl lubricates rubber joker valves while preventing trapped flush water from cracking macerator pumps.
Dampness trapped inside closed cockpits and cabins fosters aggressive mildew growth that ruins upholstery, canvas seams, and headliners. Strip all removable cushions, life vests, lines, and paper goods from the boat for indoor dry storage. Vacuum the bilge, sponge out standing puddle water, and position disposable moisture-absorbing chemical buckets or hanging desiccant bags throughout enclosed cabins and under-seat hatches.
When transporting your vessel off the water for season-ending maintenance, utilizing a local boat launch ramp allows you to safely trailer the craft, pull hull drain plugs on the incline, and allow all bilge water to escape completely before traveling home.
Selecting Covers and Fabric Shields for Cold Storage
Protecting deck gelcoat, vinyl seating, and windshield frames from snow, ice, and ultraviolet radiation requires a dependable physical barrier. High-grade canvas covers crafted from woven polyester or acrylic marine fabrics offer durable protection while permitting trapped moisture vapor to breathe outward. This natural breathability significantly limits the formation of mold on exposed interior surfaces during damp, thawing cycles.

Standard blue utility tarps from hardware stores are fundamentally ill-suited for long-term boat protection. These plastic tarps lack UV inhibitors, tearing easily after weeks of harsh sun and freezing wind. Furthermore, non-breathable poly tarps trap damp air underneath like a greenhouse, encouraging rapid mildew accumulation, while loose grommets flap in heavy gusts and scuff gelcoat finishes.
A proper winter boat cover requires an internal support system to shed precipitation. Install adjustable telescoping aluminum poles or build a wooden framework running along the vessel centerline from bow to stern. Tightly tensioning tie-down straps prevents low spots where heavy puddles of meltwater or packed snow could form, collapse the framework, and damage windshields or deck cleats.
Owners who temporarily position their crafts in transitional coastal slips before hauling out can reference listings for transient slips to secure sheltered dockage while final trailering logistics, canvas fittings, and yard appointments are arranged.
Shrink Wrapping Techniques and Moisture Mitigation
Marine shrink wrap provides the tightest, most weather-resistant protective shell available for outdoor boat storage. Manufactured from heavy-duty low-density polyethylene treated with UV inhibitors, shrink wrap sheets typically measure seven to ten mils in thickness. When subjected to controlled heat from a specialized propane heat gun, the plastic film contracts tightly around the boat, forming an aerodynamic shield that shrugs off rain, ice, and heavy snow loads.
The integrity of a shrink-wrap installation depends heavily on the framework built underneath it. Technicians install a wooden 2x4 ridgepole supported by vertical uprights capped with protective pads to distribute weight across deck surfaces. Woven polyester strapping is strung tightly from the ridgepole to external tie-points, creating a rigid skeleton that maintains steep roof angles and prevents the heated plastic from sagging.
Enclosing a boat in impermeable plastic without ventilation turns the hull into a damp chamber ripe for fungal growth. Professional installations always include weather-hooded louvers cut into the plastic along the ridgepole to promote cross-ventilation. Hanging moisture-absorbing desiccant bags inside and adding a zippered access door allows owners to periodically inspect bilges and battery monitors throughout the winter months.
If you plan to store your craft in northern states like marinas in New York, professional wrap services are standard operating procedure to withstand relentless freeze-and-thaw cycles along lakes and coastal waterways.
Trailer Maintenance and Yard Blocking for the Cold Season
Hull storage posture matters just as much as internal engine servicing. When keeping a boat on its trailer outdoors, elevate the tongue jack to create a distinct backward tilt. This angle allows rainwater entering any uncovered cockpit spaces or scuppers to drain straight through the open transom drain plug rather than accumulating in the forward bilge.
Trailer tires sitting stationary on damp ground or cold concrete for months can develop flat spots, dry rot, and tread cracking. Relieve suspension strain by elevating the trailer frame slightly onto sturdy jack stands positioned under structural crossmembers. If the trailer must remain on its tires, park the wheels on wide wooden planks or rubber pads to prevent direct soil moisture absorption, and install UV-protective wheel covers.
Boats stored on land without trailers at marina facilities are blocked on heavy wooden timber cribbing under the keel, with adjustable steel jack stands bracing the hull sides. The keel blocks carry virtually all the vessel weight, while the lateral jack stands provide side-to-side stabilization. Chains must link opposing jack stands under the hull to prevent stands from walking outward under snow loads.
Whether arranging dry dockage, yard blocking, or winter trailer pads, reviewing listings across the national network at the comprehensive marina directory gives access to storage facilities offering dedicated winterization and secure compound storage.
Battery Preservation and Onboard Electrical Care
Sub-freezing temperatures dramatically diminish electrochemical activity within lead-acid and AGM marine batteries. A fully charged battery possesses an electrolyte freezing point well below minus fifty degrees Fahrenheit, but a discharged battery can freeze solid at twenty-five degrees Fahrenheit. Freezing cracks battery casings, bends internal lead plates, and permanently destroys the cell.
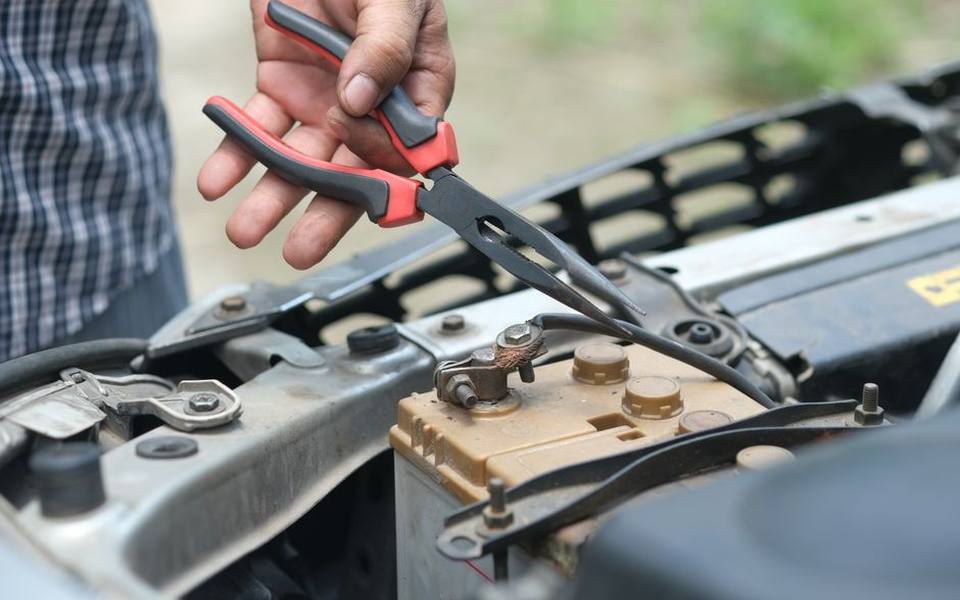
Disconnect battery negative cables to eliminate parasitic electrical draws from bilge alarms, stereos, or helm instrumentation. Clean the battery posts using a wire terminal brush and a baking soda solution to remove acidic corrosion, wipe the casings dry, and coat the terminal studs with dielectric grease or corrosion-inhibiting spray to block moisture buildup.
Whenever feasible, pull the batteries from the vessel entirely and store them in a climate-moderated garage, shed, or basement workshop. Connect the batteries to an intelligent, multi-stage maintenance charger that monitors voltage levels and delivers small trickle currents without overcharging the cells. Never place batteries directly on bare soil; store them on a sturdy wooden workbench or shelf.
Inspect all accessible electrical buses, grounding blocks, and multi-pin wiring harnesses behind the helm station. Spritzing marine moisture-dispersing corrosion inhibitors over switch terminals and gauge wiring prevents the humid, stagnant winter air from oxidizing copper contacts before spring repowering.
Spring Commissioning Overview to Reverse the Layup
Reversing the winterization process in spring requires the same systematic care applied during autumn layup. Carefully slit shrink wrap open down its perimeter strapping, avoiding blade contact with gelcoat or topside rub rails, and fold the plastic sheeting for recycling. Inspect the hull, bilge, and cabin areas thoroughly for any signs of water intrusion, animal nests, or damp mildew deposits.
Reinstall fully charged batteries, verifying clean terminal connections and applying proper torque to wing nuts or locking hex nuts. Check that the bilge pump float switch trips freely by hand and that the pump activates crisply. Reinstall the hull garboard drain plug, sealing threads with fresh Teflon tape to ensure a watertight bond before the hull touches water.
Inspect fluid levels on your outboard engine, including engine oil, power trim reservoirs, and lower unit gear lube, confirming there has been no winter leakage past seals. Connect flushing muffs and fresh water to the lower unit, prime the fuel bulb, and start the engine on dry land before driving to the launch ramp, verifying that the water pump streams coolant promptly and the motor idles smoothly.
Review safety equipment before planning your first seasonal outing. Check fire extinguisher expiration dates, verify life jacket condition, test running lights, and ensure registration paperwork is current. Taking time for a calculated spring recommissioning run guarantees that all your autumn prep work pays off in reliable, worry-free days on the water.
Published 2026-09-21 · reviewed with each rebuild, last September 2026.
Find marinas near you
The directory lists 7,143 marinas by state and city — pick your state or use the “Near me” button in the header.
More guides
-
 Safety
Boat Fire Extinguisher Inspection: Schedule, Checklist, and Costs
-
 Money
MoneyBoat Club Membership Costs: Initiation Fees, Monthly Dues, and Ownership Comparison
-
 Storage
Boat Winterization and Storage: Costs, Checklist, and Shrink Wrapping Guide
-
 Storage
Boat Slips and Docking Fees: How Much Does It Cost to Keep a Boat in the Water?
-
 Owning
Essential Nautical Terms and Practical Boating Knowledge: From the Helm to Harbor Life
-
 Owning
A Practical Guide to Boat Mooring: Buoys, Lines, and Technique
-
 Safety
Essential Boat Safety Gear, Marine Electronics, and Equipment Guide
-
 Service
Outboard Engine Service and Rebuild Costs: What Boat Owners Should Expect to Pay
-
 Safety
Marine Weather Forecasts and Warnings: Reading NOAA Reports and Coastal Maps
-
 Safety
Boating Safety Certification and Licensing: State Requirements and Exam Prep
-
 Service
Saltwater and Freshwater Fishing Charters: Choosing Inshore, Offshore, and Deep Sea Trips
-
 Owning
Bareboat Yacht Charters: How to Rent, Qualifications, and Cruising Preparation
-
 Buying
Pontoon & Tritoon Boats: Buying, Renting, Models, and Pricing Guide
-
 Owning
Holiday Boat Parades and Coastal Festivals: Viewing Guide and Schedules
-
 Buying
A Complete Guide to Buying Used Boats: Valuations, Inspections, and Registration
-
 Owning
Waterfront Dining and Dockside Restaurants: Boater's Guide to Dock and Dine
-
 Owning
Dockside Bait Systems, Live Bait Sourcing, and Fish Cleaning Station Setup
-
 Safety
Marine Fire Safety Inspection and Extinguisher Maintenance
-
 Buying
Electric Boat Motors and Trolling Systems: The Practical Conversion Guide
-
 Owning
A Practical Guide to Public Boat Launches, Kayak Ramps, and Water Access
-
 Owning
Marine Lithium Batteries vs AGM: Setup, Charging, and Performance
-
Service
Boat Fiberglass & Gelcoat Repair Guide: Fixing Cracks, Blisters & Scratches
-
Service
Marine Fuel Tank Cleaning and Rust Removal Guide
-
Safety
USCG Captain's License Guide: OUPV 6-Pack Requirements and Renewal
-
Buying
Boat Dinghies and Inflatables Guide: Types, Motors, and Selection
-
Service
Boat Towing Services and Marine Assistance Memberships Explained
-
Owning
Boat Lettering, Registration Numbers, and Custom Vinyl Decals
-
Service
Outboard Motor and Lower Unit Maintenance, Repair, and Marine Diesel Guide
-
Buying
Shallow Water Anchor Systems: Power-Pole vs. Minn Kota Talon & Raptor
-
 Service
Complete Guide to Marine Bottom Paint and Antifouling Application
-
Owning
Cruising America's Great Loop: Route Planning, Boat Choice, and Cruising Resources
-
Service
Boat and Fishing Charters: Complete Guide to Styles, Rates, and Booking
-
Buying
Personal Watercraft and Jet Ski Guide: Models, Rentals, and Buying
-
 Owning
Marine Supply Stores and Chandleries: Outfitting Your Boat
-
Safety
Marine Weather Forecasts and NOAA Wave Reports: A Practical Boater's Guide
-
Safety
USCG Boat Registration, Boater Education, and Navigational Safety Rules
-
Owning
Marine Lithium Batteries, Solar Panel Systems, and Trickle Charging Guide
-
Service
Boat Trailer Maintenance: Bearings, Replacement Kits, and Towing Prep
-
Safety
Marine VHF Radio Frequencies, Channels, and Electronics Setup
-
 Service
Complete Boat Hull Maintenance Guide: Washing, Acid Cleaners, Gelcoat Repair, and Antifouling Paint
-
Service
Fixing Inflatable Boat Leaks and Replacing Worn Bimini Top Canvas
-
Owning
Buoy Mooring Setup, Dock Lines, Cleat Hitch Knots, and Anchor Pins
-
 Owning
Boat Trim Tabs Guide: Lenco, Zipwake, Bennett, and Electric vs Hydraulic
-
Owning
Upgrading Boat Swim Platforms, Boarding Ladders, and Marine Vinyl Seating
-
Owning
Best Gifts for Boaters, Practical Marine Accessories, and Kayak Storage Racks