Recognizing When a Marine Fuel Tank Requires Deep Cleaning
Fuel contamination usually reveals itself through sudden engine bogging, frequent filter replacements, or visible silt swirling inside your water-separating canister. In marine environments, temperature swings force air through the tank vent, allowing moisture to condense against interior metal walls. Over time, phase-separated ethanol gasoline or degraded diesel fuel creates a layer of sticky varnish and acidic sludge along the bottom. If your engine dies shortly after getting up on plane, the motion of the hull is likely stirring up loose particulate that promptly chokes off fuel pickups.
Routine filter changes can mask a dirty reservoir for a short period, but fine rust scale and oxidized gum will eventually bypass secondary elements and reach your injectors or carburetors. A simple inspection with an explosion-proof bore light inserted through the fuel sender opening often confirms whether you are dealing with minor floating debris or widespread surface oxidation. When rust sediment or dark petroleum gel repeatedly clogs fresh filter elements within a few engine hours, running normal maintenance doses of fuel treatment will no longer resolve the restriction.
Differentiating between degraded fuel and structural degradation is critical before attempting any repairs. Aluminum tanks develop a white, crusty aluminum oxide dust that eventually causes pinholes, while vintage mild steel tanks shed flaky reddish-brown ferric oxide flakes. Plastic tanks will never corrode, but they still trap heavy petroleum sludge, microbial growths, and varnished gum. Deciding whether you can clean the reservoir in place or need to pull it from the hull depends on accessibility, tank material, and the extent of contamination found across the interior baffles.
Safety Protocols, Grounding, and Workspace Preparation
Handling gasoline or diesel inside an enclosed boat hull introduces significant fire, explosion, and toxic vapor hazards that require strict safety routines before opening any fittings. Disconnect your batteries entirely at the negative terminals, eliminate every nearby potential ignition source, and ensure the bilge blower is turned off, as electric motor brushes can easily spark lingering fumes. Work outdoors in an open, well-ventilated yard rather than an enclosed boat shed whenever you are siphoning volatile hydrocarbons or cleaning out a fuel tank.
Static electricity can ignite atomized gasoline vapors in a fraction of a second when fluid moves through dry hoses or funnels. Attach a dedicated bonding strap with brass alligator clamps between the fuel tank body, the transfer pump, and an external grounding rod. Never use common household wet-and-dry vacuum cleaners, plastic buckets that accumulate static, or unrated electric pumps for transferring fuel. Only pneumatic diaphragm pumps or manual hand pumps rated explicitly for flammable hydrocarbons should be used to empty the reservoir.
Boaters working on their craft during long cruises between transient slips should always notify local harbor staff before initiating any fuel maintenance, as municipal harbor regulations typically forbid open fuel transfers on active docks. Keep a charged, marine-rated dry chemical fire extinguisher immediately at hand, and wear vapor-rated respirators along with nitrile gloves to avoid chemical absorption. Ventilate low-lying hull recesses continuously using intrinsically safe, spark-free air movers to prevent heavy gas fumes from pooling.
Draining Stale Fuel and Managing Residual Petroleum Sludge
The first physical step in fuel tank cleaning involves evacuating every drop of compromised fuel resting above the bottom sediments. Because standard boat pickup tubes terminate an inch or two above the lowest floor of the tank to prevent drawing settled water into the engine, you cannot simply pump the tank empty through the normal fuel line. You will need to remove the fuel level sending unit or an inspection plate on the top surface to drop a flexible siphon hose directly into the lowest rear corner of the chamber.
Tilt the trailer tongue or adjust boat trim tabs so that gravity pools the liquid toward one corner of the tank, simplifying the evacuation of old fluid. Pump the contaminated fuel into clean, approved transport drums, watching for changes in fluid clarity that signal you have transitioned from usable fuel to water-laden sludge. In most states, disposing of spoiled gasoline mixed with water or rust scale requires drop-off at an authorized hazardous waste collection facility, as marinas and ordinary recycling centers strictly prohibit taking tainted hydrocarbons.
Once bulk pumping is complete, a thick, tarry sediment layer mixed with gritty rust inside fuel tank crevices often remains adhered to bottom seams. Scraping this layer manually with non-sparking brass, bronze, or stiff polymer tools through the sender hole helps dislodge heavy deposits before chemical washing starts. Avoid steel putty knives or wire scrapers that can score soft metal tanks or generate mechanical friction sparks against bare internal baffles.
Flushing Loose Debris and Selecting Gasoline Tank Cleaners
After evacuating stale fuel, the reservoir requires aggressive flushing to lift trapped varnish, gum, and residual moisture out of internal baffle corners. Commercial petroleum tank cleaners formulated with concentrated surfactants and aromatic emulsifiers are designed to cut through sticky varnish without leaving corrosive residues. You can introduce a measured quantity of specialized gasoline tank cleaner, rock the boat gently on its trailer, and extract the emulsified liquid using your manual pump to lift loose particulates out of the tank bottom.
Water-based marine degreasers can also be used if the tank is heavily coated in petroleum tar, provided every trace of water is dried out afterward. Hot water blended with heavy-duty biodegradable degreasers breaks loose petroleum residue quickly, but flushing with water demands extensive vacuum extraction and warm forced-air drying to prevent rapid flash rusting. If you are cleaning an installed tank aboard a vessel docked at coastal facilities, such as marinas in Florida, high ambient humidity will slow internal evaporation, making an anhydrous alcohol wash useful for absorbing remaining moisture.
Run the flush fluid through an external inline filter during cleaning passes so you can monitor how much particulate is breaking free with each rinse cycle. Continue circulating wash solvents or flushing fresh cleaner through the reservoir until the discharged fluid emerges free of suspended grit, black sludge, and cloudy water droplets. Multiple short wash cycles using small volumes of solvent usually lift far more sediment than a single, massive wash with stagnant liquid sitting idle in the tank.
Diagnosing Rust Inside Gas Tank Structures and Assessing Metal Integrity
Finding visible rust inside gas tank walls requires a careful assessment of the metal's remaining wall thickness before attempting chemical restoration. Mild steel tanks, commonly installed in classic runabouts and older cruisers, are particularly susceptible to severe pitting along the bottom where phase-separated water pools under undisturbed fuel. If rust flakes are thick enough to crumble between your fingers like dry bark, deep galvanic pits may have already compromised the structural safety margin of the metal.
Inspect the external underside of the tank wherever possible, especially around mounting straps, neoprene pads, and wooden cradles where trapped moisture causes external corrosion simultaneously. Tapping suspiciously thin areas with a small wooden mallet or brass drift provides a quick auditory check; a solid, resonant ring signals structural sound metal, while a dull thud or flexing wall indicates severe thinning. If internal rust removal from fuel tank surfaces reveals localized pinholes or paper-thin sheet metal, abandoning cleaning in favor of total tank replacement is the only responsible option.
Aluminum tanks do not form iron oxide rust, but they suffer from poultice corrosion and severe pitting when water separates from ethanol gasoline blends. The white, chalky aluminum hydroxide residue that forms in an aluminum reservoir behaves similarly to rust scale, choking off filters and eroding fuel pump vanes. For both metals, treating superficial scale early prevents structural perforations that would otherwise turn an affordable maintenance job into a complex hull deconstruction project.
Chemical Rust Removal and Safe Derusting Gas Tank Techniques
Cleaning rust out of fuel tank interiors without grinding or cutting requires specialized chemical rust converters and dissolvers. Modern acid-based derusting gas tank treatments rely primarily on phosphoric acid, citric acid, or proprietary chelating formulas to dissolve iron oxide while leaving bare, uncorroded base metal intact. Chelation agents bind specifically to iron ions at a molecular level, offering a non-hazardous, fume-free method to clean intricate baffles that cannot be reached by hand.
A quality petrol tank rust remover based on diluted phosphoric acid works by converting active red iron oxide into an inert, dark gray iron phosphate coating. This microscopic phosphate barrier provides temporary protection against flash rusting while the interior air dries. When applying an acidic rust dissolver, the tank must be completely filled or rotated regularly so that all contaminated internal surfaces remain wet with the solution for several hours, depending on ambient temperatures and scale thickness.
Once the chemical has dissolved the rust layer, thoroughly flush the tank with clean water mixed with a small amount of neutralizing agent like baking soda if required by the chemical manufacturer. Follow the neutral rinse immediately with an isopropyl alcohol or acetone rinse to displace lingering water droplets from welded joints and recessed seams. Rapidly dry the interior using an electric heat gun on a low, non-sparking setting or a clean shop air line to prevent moisture from initiating new surface oxidation.
Mechanical Agitation Methods for Heavy Scale and Flaking Deposits
When dealing with heavy rust scale cemented to the tank floor, chemical cleaners alone may struggle to penetrate beneath the thickest crusts. Mechanical agitation breaks through dense oxidation layers, allowing chemical derusters to reach base metal much faster. For tanks that have been completely removed from the boat hull, adding an abrasive tumbling media alongside a degreasing solvent physically shears loose flakes off internal walls as the tank is rotated.
Safe mechanical abrasives include short lengths of clean steel sash chain, smooth brass nuts, or crushed walnut shells poured through the sending unit port. Avoid gravel, pea stone, or glass marbles, as brittle rocks break apart under friction, leaving abrasive silica dust trapped inside the tank that will destroy fuel pumps later. Fasten the chain to a sturdy retrieve wire outside the tank opening so you can easily pull the entire assembly out once mechanical agitation is complete.
Rotate and roll the tank manually on a soft work mat or old tire, changing angles so the tumbling chain sweeps across every baffle, corner, and bulkhead wall. Pour out the resulting slurry of pulverized rust and solvent through the main filler neck, repeating the mechanical rinse until no large metal flakes emerge. After removing your agitation media, perform a thorough magnetic sweep inside steel tanks using an insulated retriever magnet to collect any lingering iron particles.
Tank Liners and Internal Sealers: Evaluating Risks and Benefits
Applying a liquid epoxy or polyurethane tank liner is a common technique in motorcycle and automotive restoration, but it requires extreme caution in marine applications. Marine fuel tanks are subject to continuous hull flexing, engine vibration, and aggressive modern fuel chemistries containing ethanol or specialized fuel stabilizers. If an internal liner fails to adhere perfectly due to microscopic oil films or flash rust, it will eventually blister, peel, and wrap around your fuel pickup tube, causing sudden engine shutdown in open waters.
Most marine surveyors and experienced mechanics strongly advise against coating the interior of permanently installed boat fuel tanks with pour-in sealers. The presence of internal baffling makes it nearly impossible to inspect the uniform thickness of the cured coating, and trapped air pockets beneath the liner can harbor accelerated corrosion. Bare, chemically passivated metal maintained with dry fuel and routine water extraction is far safer and more predictable over years of service than an unproven chemical barrier.
If an external contractor or specific restoration circumstance mandates a tank coating, verify that the formulation is explicitly certified for permanent immersion in modern marine fuels, including high-aromatic gasoline blends and low-sulfur diesel. Follow cure schedules meticulously, allowing multiple days of ventilation at stable ambient temperatures before introducing hydrocarbons. Any evidence of lifting, clouding, or delamination observed during seasonal sender inspections means the tank must be condemned and removed from the vessel.
Applying Fuel System Cleaners and Preventive Additives
Once the internal reservoir is clean and dry, regular fuel treatments help keep lines, injectors, and bare metal protected against recurring degradation. Concentrated detergent additives, such as a chevron fuel system cleaner containing polyetheramine (PEA), are engineered to dissolve deposit precursors before they bake onto intake valves and combustion surfaces. Polyetheramine chemistry survives intense combustion heat, making it effective for scouring away varnish throughout the entire induction tract without leaving behind carbon residues.
For boaters dealing with lingering exhaust soot, sticky oxygen sensors, or fouled catalytic elements on modern sterndrives, multi-stage maintenance cleaners like a cataclean fuel and exhaust system cleaner serve a distinct functional purpose. These chemical cleaners work downstream from the fuel tank, vaporizing into active cleaning gases that reduce hydrocarbon buildup across exhaust manifolds and catalytic cores. However, owners must understand that exhaust-oriented chemical treatments cannot clean physical rust chunks out of a contaminated reservoir; they belong in a clean fuel system as a secondary maintenance step.
Preventive fuel conditioning also requires an active corrosion inhibitor that guards against phase-separated water pooling along bare metal floors. Adding a quality marine-grade fuel stabilizer at every fill-up arrests fuel oxidation during seasonal storage periods. Routine additive use keeps internal surfaces passivated, but chemical treatments should never be viewed as a substitute for physically cleaning out a fuel tank that is already heavily choked with loose oxidation scale.
Professional Fuel Polishing Services Versus Complete Tank Replacement
Boaters facing massive contamination in large, inaccessible tanks often turn to professional fuel polishing services rather than attempting manual DIY removal. Mobile fuel polishing units connect high-flow commercial filtration rigs, centrifugal water separators, and magnetic debris traps to your fuel lines, circulating the tank contents repeatedly at dozens of gallons per minute. This sweeping action creates turbulence that lifts settled water, microbial mats, and loose silt out of the bottom without requiring the tank to be extracted from the stringers.
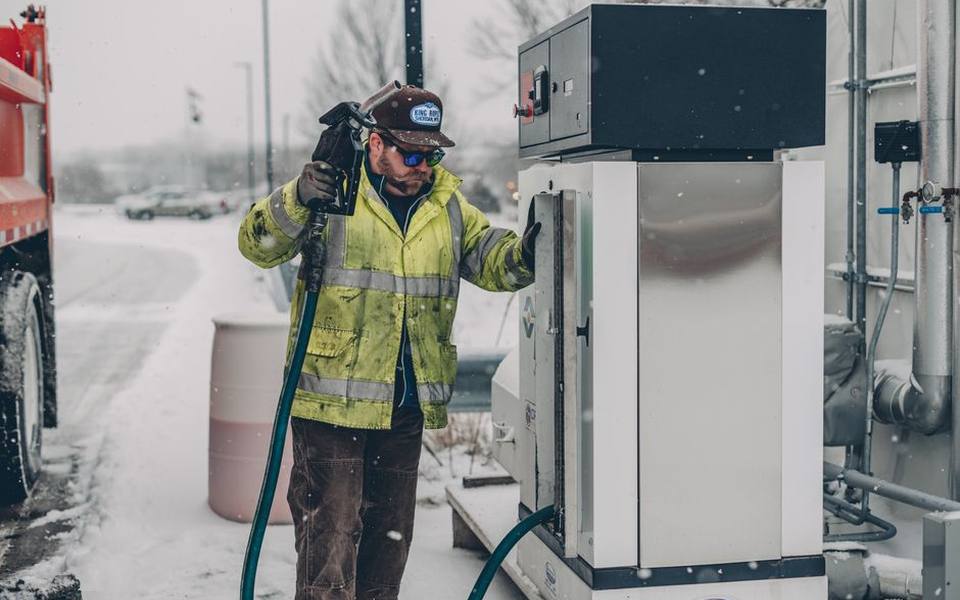
Professional polishing works exceptionally well for diesel systems suffering from biological algae blooms and suspended water, but it has distinct limitations with heavily rusted steel gasoline tanks. High-velocity polishing filtration can capture suspended flakes, but it cannot dissolve bonded rust scale or rebuild thinned metal. If your vessel is berthed near busy freshwater cruising hubs featured in the directory, such as marinas in Michigan, local service yards typically offer mobile polishing rigs that can treat hundreds of gallons in an afternoon.
When the cost of multiple polishing sessions, chemical flushes, and emergency filter replacements begins to mount, complete tank replacement becomes the logical financial choice. Slicing through fiberglass decks or unbolting engine mounts to pull an obsolete tank involves significant labor, but installing a modern cross-linked polyethylene or heavy-gauge aluminum tank delivers permanent peace of mind. A new tank ensures your fuel system meets current safety standards, eliminating the recurring hazard of engine failure in turbulent water.
Reassembly, Leak Testing, and Best Practices for Long-Term Prevention
Reassembling the fuel delivery system requires fresh gaskets, new fuel-rated hose sections, and careful torque management on all inspection plates. Always replace old cork or rubber sending unit gaskets with ethanol-resistant Viton or nitrile components, applying an approved non-hardening marine thread sealant to all threaded brass fittings. Tighten sending unit bolts in a crisscross star pattern to evenly compress the gasket without pinching the seal or warping the thin top mounting flange.
Before refilling the tank with fresh fuel, conduct a low-pressure air decay test to ensure all fittings, pickups, and weld seams are completely vapor-tight. Seal all open ports, pressurize the tank to no more than two to three pounds per square inch using a bicycle pump or regulated air line, and spray every seam with soapy water to check for bubbling leaks. Never use high air pressure on a marine fuel tank, as excessive pressure will easily rupture flat internal baffle plates and split welded exterior corners.
After passing pressure checks, trailer the boat down to a local boat ramp to test the engine under working loads while carrying spare primary and secondary filter elements. Practice proactive fuel hygiene by keeping fuel tanks nearly full during layups to minimize moist headspace air, replacing fuel-water separator filters annually, and occasionally drawing fuel samples through an inspection port. Diligent care keeps your newly restored fuel reservoir pristine, ensuring dependable engine performance across every voyage.
Published 2026-09-21 · reviewed with each rebuild, last September 2026.
Find marinas near you
The directory lists 7,143 marinas by state and city — pick your state or use the “Near me” button in the header.
More guides
-
 Safety
Boat Fire Extinguisher Inspection: Schedule, Checklist, and Costs
-
 Money
MoneyBoat Club Membership Costs: Initiation Fees, Monthly Dues, and Ownership Comparison
-
 Storage
Boat Winterization and Storage: Costs, Checklist, and Shrink Wrapping Guide
-
 Storage
Boat Slips and Docking Fees: How Much Does It Cost to Keep a Boat in the Water?
-
 Owning
Essential Nautical Terms and Practical Boating Knowledge: From the Helm to Harbor Life
-
 Owning
A Practical Guide to Boat Mooring: Buoys, Lines, and Technique
-
 Safety
Essential Boat Safety Gear, Marine Electronics, and Equipment Guide
-
 Service
Outboard Engine Service and Rebuild Costs: What Boat Owners Should Expect to Pay
-
 Safety
Marine Weather Forecasts and Warnings: Reading NOAA Reports and Coastal Maps
-
 Safety
Boating Safety Certification and Licensing: State Requirements and Exam Prep
-
 Service
Saltwater and Freshwater Fishing Charters: Choosing Inshore, Offshore, and Deep Sea Trips
-
 Owning
Bareboat Yacht Charters: How to Rent, Qualifications, and Cruising Preparation
-
 Buying
Pontoon & Tritoon Boats: Buying, Renting, Models, and Pricing Guide
-
 Owning
Holiday Boat Parades and Coastal Festivals: Viewing Guide and Schedules
-
 Buying
A Complete Guide to Buying Used Boats: Valuations, Inspections, and Registration
-
 Owning
Waterfront Dining and Dockside Restaurants: Boater's Guide to Dock and Dine
-
 Owning
Dockside Bait Systems, Live Bait Sourcing, and Fish Cleaning Station Setup
-
 Safety
Marine Fire Safety Inspection and Extinguisher Maintenance
-
 Storage
Complete Guide to Boat Winterization, Shrink Wrapping, and Storage Covers
-
 Buying
Electric Boat Motors and Trolling Systems: The Practical Conversion Guide
-
 Owning
A Practical Guide to Public Boat Launches, Kayak Ramps, and Water Access
-
 Owning
Marine Lithium Batteries vs AGM: Setup, Charging, and Performance
-
Service
Boat Fiberglass & Gelcoat Repair Guide: Fixing Cracks, Blisters & Scratches
-
Safety
USCG Captain's License Guide: OUPV 6-Pack Requirements and Renewal
-
Buying
Boat Dinghies and Inflatables Guide: Types, Motors, and Selection
-
Service
Boat Towing Services and Marine Assistance Memberships Explained
-
Owning
Boat Lettering, Registration Numbers, and Custom Vinyl Decals
-
Service
Outboard Motor and Lower Unit Maintenance, Repair, and Marine Diesel Guide
-
Buying
Shallow Water Anchor Systems: Power-Pole vs. Minn Kota Talon & Raptor
-
 Service
Complete Guide to Marine Bottom Paint and Antifouling Application
-
Owning
Cruising America's Great Loop: Route Planning, Boat Choice, and Cruising Resources
-
Service
Boat and Fishing Charters: Complete Guide to Styles, Rates, and Booking
-
Buying
Personal Watercraft and Jet Ski Guide: Models, Rentals, and Buying
-
 Owning
Marine Supply Stores and Chandleries: Outfitting Your Boat
-
Safety
Marine Weather Forecasts and NOAA Wave Reports: A Practical Boater's Guide
-
Safety
USCG Boat Registration, Boater Education, and Navigational Safety Rules
-
Owning
Marine Lithium Batteries, Solar Panel Systems, and Trickle Charging Guide
-
Service
Boat Trailer Maintenance: Bearings, Replacement Kits, and Towing Prep
-
Safety
Marine VHF Radio Frequencies, Channels, and Electronics Setup
-
 Service
Complete Boat Hull Maintenance Guide: Washing, Acid Cleaners, Gelcoat Repair, and Antifouling Paint
-
Service
Fixing Inflatable Boat Leaks and Replacing Worn Bimini Top Canvas
-
Owning
Buoy Mooring Setup, Dock Lines, Cleat Hitch Knots, and Anchor Pins
-
 Owning
Boat Trim Tabs Guide: Lenco, Zipwake, Bennett, and Electric vs Hydraulic
-
Owning
Upgrading Boat Swim Platforms, Boarding Ladders, and Marine Vinyl Seating
-
Owning
Best Gifts for Boaters, Practical Marine Accessories, and Kayak Storage Racks